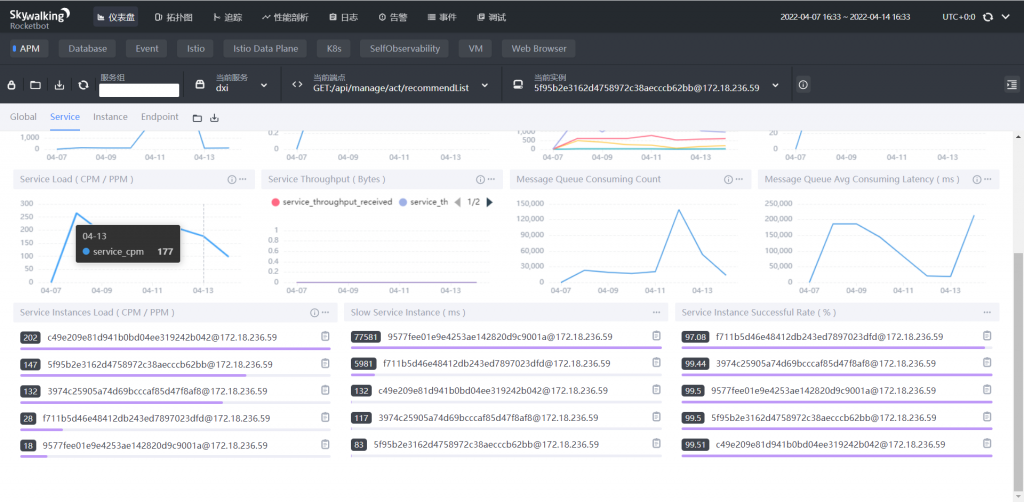
线上要偶然发现skywalking的服务成功率数据计算方式有问题,研究了一下源码顺便捋了捋
关于服务成功率
1、Skywalking
2、elk 收集 nginx 请求日志,针对status进行分组统计,编写kibana的图表展示统计结果https://blog.51cto.com/linyingyong/2084810
3、Prometheus+Grafana
1、skywalking 方式
skywalking UI指标说明
https://www.jianshu.com/p/c164be9f6f72
https://zhuanlan.zhihu.com/p/471429885
在服务器上部署agent的步骤(skywalking服务端的部署省略,可以直接下载官网的包,docker compose 运行 )

关于成功率统计算法:
源码位置:apache-skywalking-apm-8.9.1\oap-server\server-starter\src\main\resources\oal\core.oal
--服务成功率是统计了所有类型的请求(包含一个请求中的中间链路)的成功率
service_sla = from(Service.*).percent(status == true);

--如果只想统计单个http请求,可以改成:
service_sla = from(Service.*).percent(status == true);
 service_sla_http = from(Service.*).filter(type ==RequestType.HTTP).percent(httpResponseStatusCode ==200);
 service_sla_http_ok = from(Service.*).filter(type ==RequestType.HTTP).percent(status == true);
 service_sla_http_l500 = from(Service.*).filter(type ==RequestType.HTTP).percent(httpResponseStatusCode < 500);
 service_sla_http_l500 = from(Service.*).filter(type ==RequestType.HTTP).percent((httpResponseStatusCode < 500) and (httpResponseStatusCode >= 200));
参考: https://skywalking.apache.org/docs/main/v8.8.1/en/concepts-and-designs/scope-definitions/
http状态码
1XX 信息类,客户端应当继续发送请求
2XX 表示请求被正确接收,理解,接受
3XX 表示重定向
4XX 表示客户端错误
5XX 表示服务器错误
#用docker构建skywalking服务端

docker-compose up -d --force-recreate --build

#进入oap容器

sudo docker exec -it 775c7c9ee1e1 sh

#编辑oal指标文件

vi config/oal/core.oal
2、elk 收集 nginx 请求日志 (其他方式)
1.修改nginx配置日志格式为json
vim /usr/local/nginx/conf/nginx.conf

在http标签下添加:
log_format logstash_json '{ "@timestamp": "$time_local", '
'"@fields": { '
'"remote_addr": "$remote_addr", '
'"remote_user": "$remote_user", '
'"body_bytes_sent": "$body_bytes_sent", '
'"request_time": "$request_time", '
'"status": "$status", '
'"request": "$request", '
'"request_method": "$request_method", '
'"http_referrer": "$http_referer", '
'"body_bytes_sent":"$body_bytes_sent", '
'"http_x_forwarded_for": "$http_x_forwarded_for", '
'"http_user_agent": "$http_user_agent" } }';
在需要收集日志server添加以下 access_log logs/www.access.log logstash_json; # logstash_json需要和上面定义名字相同(这一步主要是操作NGINX的日志格式)
2.安装filebeat 以下为 filebeat8.0.1的安装与配置(别的版本不要直接照抄,需前去官网参考)
# 下载源文件
curl -L -O https://artifacts.elastic.co/downloads/beats/filebeat/filebeat-8.0.1-linux-x86_64.tar.gz
# 解压源文件
tar xzvf filebeat-8.0.1-linux-x86_64.tar.gz
cd filebeat-8.0.1-linux-x86_64
vim filebeat.yml

############ 修改配置文件

filebeat.inputs:

- type: filestream

# 设置为true
  enabled: true

  paths:
# 设置为指定监听文件
    - /var/log/nginx/xxx-access.log

# 解析json
  parsers:
    - ndjson:
        keys_under_root: true
        add_error_key: true
        message_key: msg


# ================================== Outputs ===================================

# Configure what output to use when sending the data collected by the beat.
#

##
setup.template.enabled: false
setup.template.name: "dxi"
setup.template.pattern: "dxi-*"

# ---------------------------- Elasticsearch Output ----------------------------
output.elasticsearch:
  # Array of hosts to connect to.
  index: "dxi-log-%{+yyyy.MM.dd}"
  hosts: ["172.16.160.41:9200"]
  username: "elastic"
  password: "xxxxxx"
filebeat 配置修改需要注意的点:
1、keys_under_root、overwrite_keys 需要配置(用来将json里的key值放在数据外表)
2、需要指定好监听的path文件
3、setup.template.name、setup.template.pattern 需要配置
4、配置好 username、password、index
5、设置filebeat.yml 时需要去官网查看对应版本的配置手册 (filebeat 不同版本之间的配置方式有很大出入)
ES上的配置,具体参考: https://blog.51cto.com/linyingyong/2084810
Comments | NOTHING